This card is for the Simon Says Wednesday Challenge - Use more than one die or stamp!
I posted this earlier and said I would be back with more details and here they are.
The Spidey image is a coloring book page I found online and printed and colored with copics (R27, R29, N1 & N3), I cut the image out and attached it with foam dots. For the background I used the Haunted Webs die & Cityscape Nightline die both by Memory Box. I sponged a little bit of white chalk ink on them just to give them a little bit of detail. For the greeting I used the happy birthday dies from the Tim Holtz Celebration Words Script set. To make the happy birthday stand out a little more I used my Wink of Stella black shimmer pen on it. I glued all the die cut pieces on using Ranger Multi Medium Matte.
I can't wait to see what the next challenge is. I may even get another post done before the end of the month!!!
Thanks for stopping by
Deanna
Tuesday, March 28, 2017
Thursday, March 23, 2017
Layer It Up!
So I have been doing lots of researching, video watching and sorting through my supplies, while I have been redoing my studio. I decided the best way to get back into my crafting habit is to try some challenges. So I went over to Simon Says Stamp, one of my favorite shopping sites and looked at their challenge blogs (they have two). First stop was the Monday Challenge Blog and this weeks challenge is Layer It Up!
For this challenge I thought I would use one of my favorite stamps and revisit an old design and change things up a bit. The stamp is from the Safari Animal 2 set by Local King and I used MFT Hybrid ink Hot Fudge to stamp it. I colored the images with copic markers (E21, E23, E25, E29, YR23 & Y35) then I put a layer of glossy accents over the eyes. I edged the image with versa magic jumbo java ink and distressed the edges and layered the image on 3 different layers of card stock. I embossed the background piece with the "mesh" cuttlebug folder and used a little bit of Tim Holtz vintage photo distress ink to add a bit of an aged look to it.
For the first card I finished it with some rhinestones and used the paper smooches "happy birthday 2" wise dies to make the greeting. I cut the greeting out 3 times and stacked them together to make it stand out a bit.
For the second card I just layered the image on 3 layers of card stock to frame it out and centered it on the card with no greeting. To add a little more detail a put bronze brads in each corner.
I am happy to be back in the crafting groove, I just placed another crafty goodness order from Simon Says Stamp and will post a pic when it arrives. I can't believe how many great new products and techniques I have been finding lately. I'm so excited to get going on my crafting again.
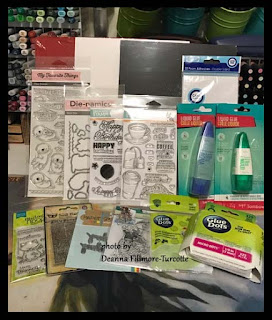
I got this order from Simon Says about a month ago. I needed to get some card stock and adhesives and I couldn't resist adding some new stamps and dies as well!
This order is stuff I picked up last year from One Crazy Stamper, I love all the matching stamps and dies! Even though I haven't posted any completed projects with these sets I have been working on making projects with these items.
For this challenge I thought I would use one of my favorite stamps and revisit an old design and change things up a bit. The stamp is from the Safari Animal 2 set by Local King and I used MFT Hybrid ink Hot Fudge to stamp it. I colored the images with copic markers (E21, E23, E25, E29, YR23 & Y35) then I put a layer of glossy accents over the eyes. I edged the image with versa magic jumbo java ink and distressed the edges and layered the image on 3 different layers of card stock. I embossed the background piece with the "mesh" cuttlebug folder and used a little bit of Tim Holtz vintage photo distress ink to add a bit of an aged look to it.
For the first card I finished it with some rhinestones and used the paper smooches "happy birthday 2" wise dies to make the greeting. I cut the greeting out 3 times and stacked them together to make it stand out a bit.
For the second card I just layered the image on 3 layers of card stock to frame it out and centered it on the card with no greeting. To add a little more detail a put bronze brads in each corner.
I got this order from Simon Says about a month ago. I needed to get some card stock and adhesives and I couldn't resist adding some new stamps and dies as well!
I will endeavor to do another challenge this week, I may even make it to 3 posts in the same month...LOL!
Thanks for stopping by and have a great weekend everyone!
Deanna
Monday, March 13, 2017
Studio Changes!!!
AFTER
So as you can see it still follows the same wall and fills most of it but I removed part of the second tier on one side. I used the cubes sideways underneath and was able to extend one half of the desk out another 16"! So now I have a huge work space on one half (that is when the cats actually let me use it...they like to use it as a bed most days).
I use this half of my desk for the computer, stamping and coloring area. I have most of my stamps stored on shelf above desk and have just finished reorganizing them all (that took forever!). I'm still working on labels for all the baskets & boxes!
I also keep most of my die sets on magnetic sheets on the storage cubes and walls. I tried storing them in boxes or pages in binders etc. but, I really need them to be out and visible. It makes life so much easier when I'm trying to decide what to use for a project.
For the other side of the desk I tried to keep a large working space clear!
I have my Cricut Create and cartridges here (more cartridges in box under cricut). Two cubes store all my 12x12 cardstock, I leave my small paper trimmer on the desk so I have it close.
I also have all my Distress & Memento inks on this desk. The brown basket houses all my containers of current works in progress.
This smaller desk that is on the end wall provides another work station. I store my Big Shot (and embossing folders), Zutter, larger paper trimmers & my sewing machine here. Sewing machine is under blue cover...girls won't leave it alone when it is isn't covered :)
BEFORE
Well, it is really late and I have probably messed up this post at some point...no doubt I will have to come back tomorrow and fix it ...LOL! Thanks for stopping by, I do have some pictures lined up for another post, maybe tomorrow!
Happy Crafting
Deanna
Subscribe to:
Comments (Atom)


